New in EventSync Workspace: video help beside your wedding plan
Plan your wedding with step-by-step video help beside your work. Build the timeline, organize contacts and payments, and prepare the handoff with short lessons you can pause and follow as you go.
New in Workspace: Page-specific Help and sixteen narrated video walkthroughs.
New: step-by-step video help for planning your wedding
Learn the tools as you build your plan. Workspace now brings page-specific Help, short narrated tutorials and a follow-along player into the planning experience. Whether you are planning your first wedding or preparing a handoff for a trusted helper, you can open guidance for the task in front of you.
Select Help or a page’s question mark. The thumbnail shows the task, a play icon and the lesson’s duration. Select it to open the larger player, then choose Watch while I work to keep the video beside your work. Pause, move it or expand it as needed.
Start with a wedding timeline template, then use Scope to show only the planning tools you need. Hidden tools keep their saved information and can be restored. Written summaries and transcripts let you review the steps without playing every video.
Workspace planning starts free. Sign in to save and sync across devices; guest planning stays in the current browser. Paid Day-Of access is separate and depends on your plan and selected wedding. These tools support the people running the wedding, who remain responsible for the plan and decisions.
Bring your starting plan with you: follow the new lessons to continue a free wedding timeline in Workspace or import an existing wedding timeline PDF. Review the draft, save it, and use Scope to keep the optional tools you need.
See Help and the follow-along player in action
Open Help, select the thumbnail, press Play, then choose Watch while I work. This 30-second demonstration shows the movable player beside a new timeline item. The example form is canceled at the end.
Actual Workspace interface · Fictional wedding · AI-narrated.
Watch this demonstration on YouTube
Read the demo narration
When you need help, open the question mark. The video thumbnail shows the task and its duration. It opens a larger player with an option to watch while you work.
EventSync started with a clear problem: a wedding plan only matters if people can actually use it when the day begins. A mobile app is the right surface for walking through a venue, checking a vendor in, advancing the live timeline, and keeping the couple out of the message relay.
But planning the wedding often happens at a desk. Guest lists, vendor contacts, seating decisions, budget details, checklist cleanup, role assignments, and handoff exports all benefit from more space. EventSync Workspace gives that planning work a desktop-first home while keeping the day-of experience connected to mobile.
What you can do in EventSync Workspace
Plan the wedding
Use the planning dashboard, timeline, templates, budget, Vendor Contacts, Planning Checklist, and setup tools from a larger screen.
Build the Guest List
Review RSVPs, meal choices, dietary notes, guest groups, and seating context without squeezing the work into a phone layout.
Prepare the handoff
Use role-aware planning, Broadcasts, Change Requests, Handoff, and Export Data views so vendors and helpers get the right information.
Move into Day-Of Command
Keep the same wedding, timeline, and team when the coordinator continues on mobile for the live day.
Help stays close while you plan
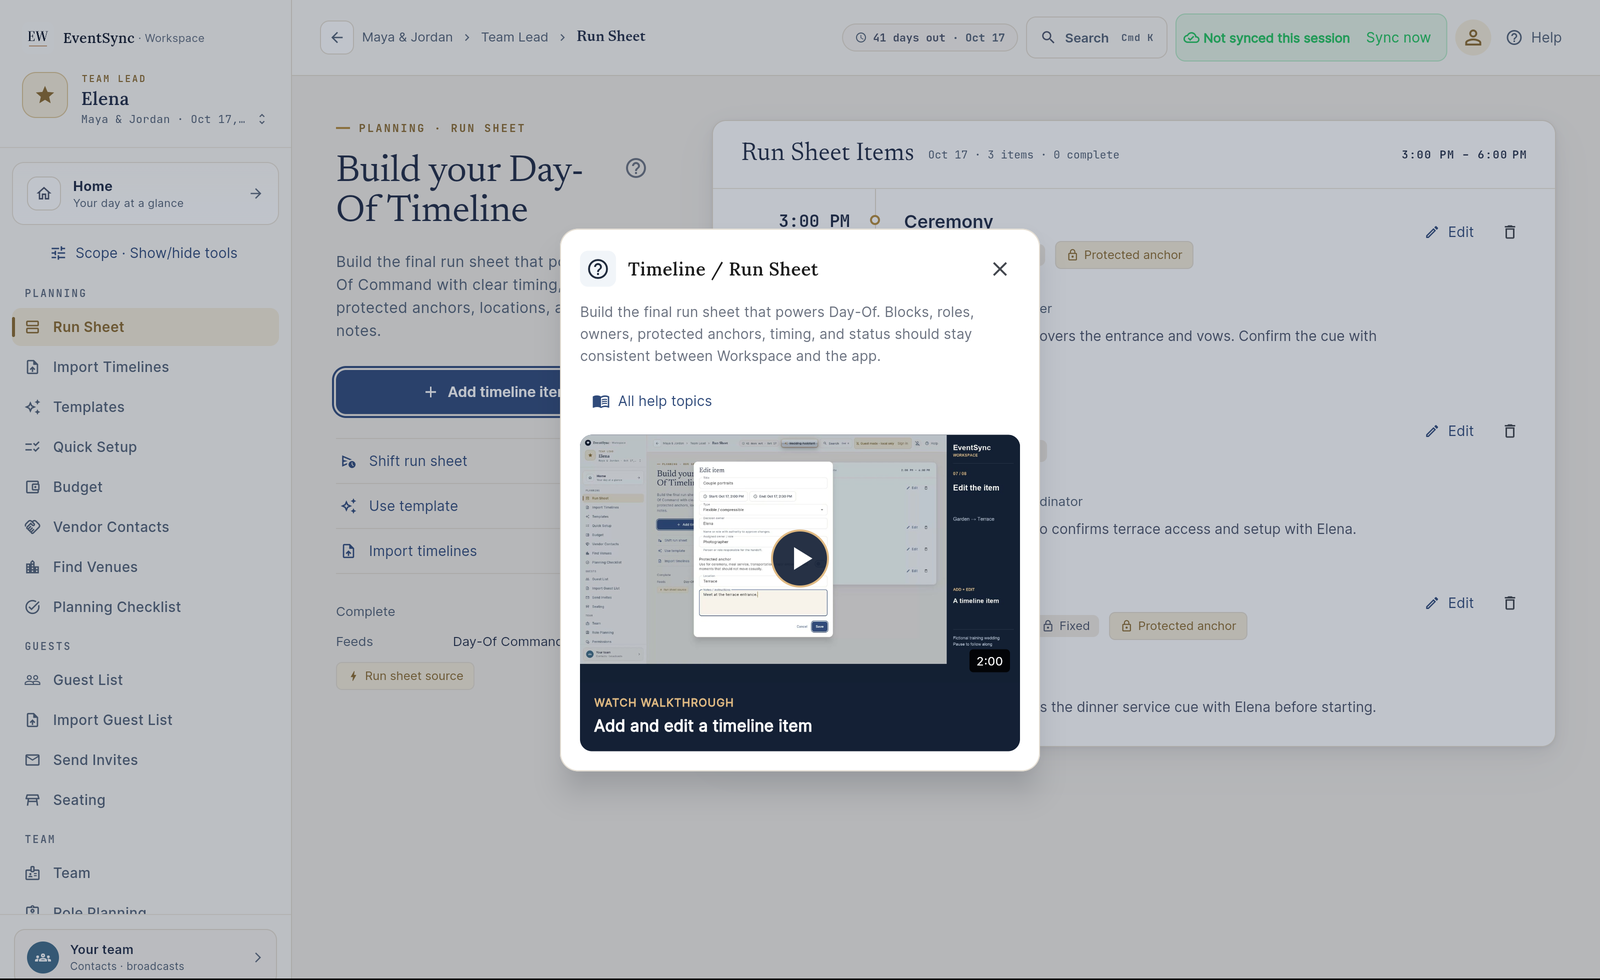
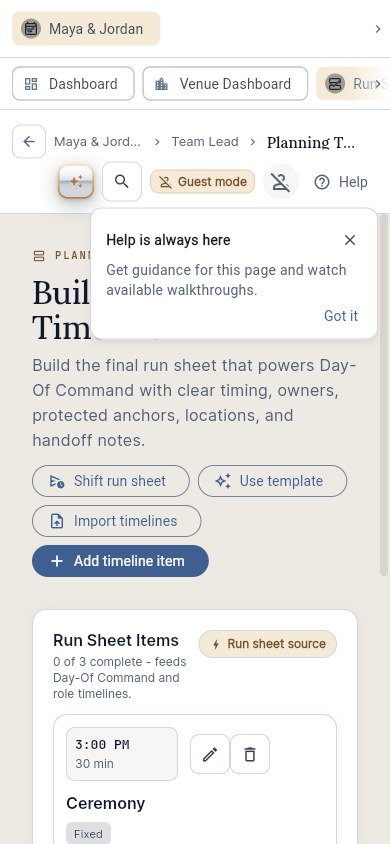
The Help button stays visible in the Workspace header on desktop and narrow screens. A small, nonblocking introduction points it out the first time you use this Help experience. Once shown, the introduction is remembered for that account in that browser.
Select Help for guidance about your current page. On supported planning pages, a video thumbnail shows the relevant task, a play icon, and its duration. Select it to open the larger player. The small Help pop-up does not play the video. Choose All help topics to browse the wider guide, then return to the same page and work.
You can dismiss the introduction, keep planning, and open Help whenever you need it. It does not start a mandatory tour.
Browse Workspace Help & FAQ or preview the timeline lesson below.
See how to add and edit a timeline item
The 2 minute narrated walkthrough shows real Workspace controls: add an item, set its timing and owners, save it, and reopen it to edit the details. It uses a fictional wedding and includes English captions and a written transcript.
Open it from Run Sheet Help, or watch the Workspace timeline tutorial and read the step-by-step guide. You can also watch the same lesson on YouTube.
Follow along while you work
Choose Watch while I work in the larger player to keep the lesson in a movable corner window while you use Workspace. Drag its header to move it, or focus the header and use the arrow keys. Choose Expand video to return to the larger player. Closing it stops playback and leaves your work in place.
The lesson covers adding and editing one item. For a starting schedule, compare complete wedding timeline examples; for a closer look at live team use, explore the wedding timeline app.
Plan your wedding with video help beside your work
Start with the wedding name and the people who will run the day. Workspace brings the plan onto a wider screen, with short lessons beside the planning tools.
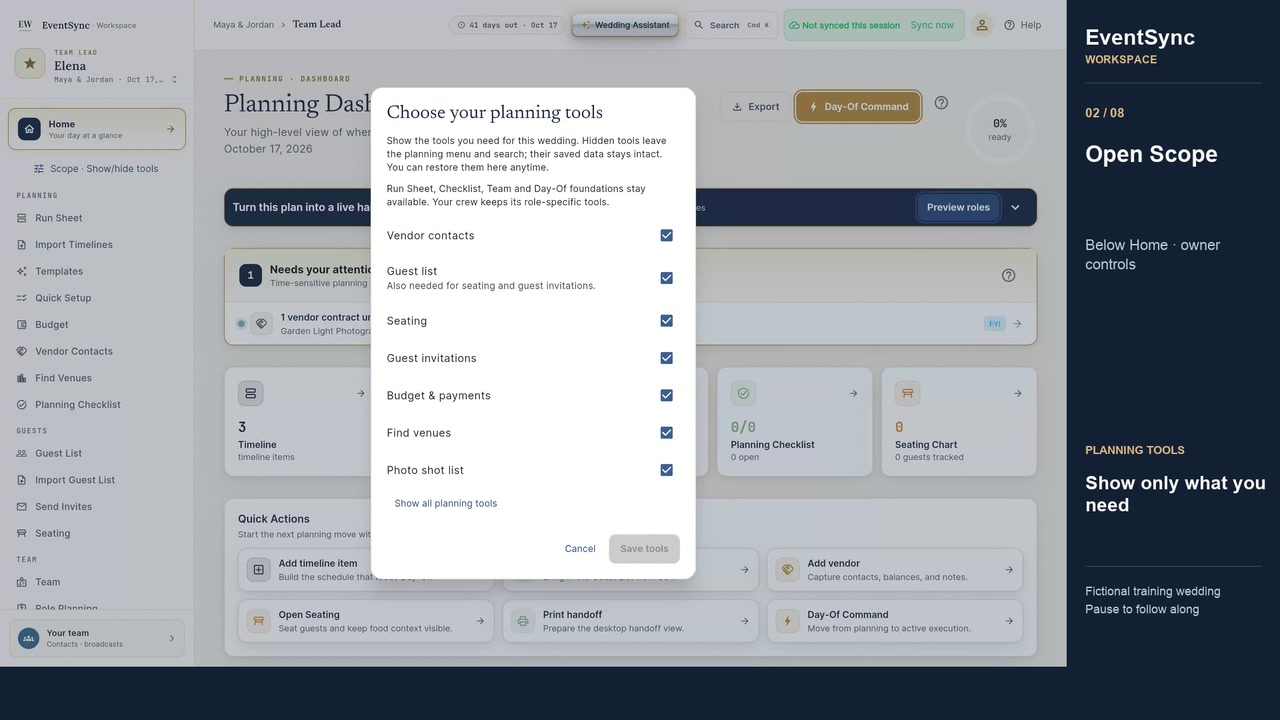
- Use Scope to choose the optional tools for this wedding. Hidden tools can be restored without deleting their saved information.
- Build Run Sheet around the day’s fixed commitments. Add times, locations, instructions and the person responsible for each decision.
- Keep Vendor Contacts and Guest List current. In Budget, distinguish the total cost from payments already made; use Checklist for the remaining preparation.
- Open Help for a task lesson. Select its thumbnail, then choose Watch while I work in the larger player.
- Review readiness with your trusted lead and save a printed backup before the wedding.
1:45 · Fictional training wedding · Actual Workspace interface · AI-narrated with reviewed English captions. Free planning and paid Day-Of access are separate.
Watch on YouTubeOpen Workspace
Read the walkthrough transcript
EventSync Workspace brings the wedding plan onto a wider screen so you can prepare it with the people who will run the day. This is Maya and Jordan's fictional training wedding. Start at Home and check the wedding name. Use Scope to choose the optional planning tools you need. You can restore hidden tools later without deleting their saved information. Open Run Sheet to review the order of the day. Give each moment a time, location, clear instruction, and someone responsible for the decision. Keep Vendor Contacts ready, review the Guest List, and track planned costs and payments in Budget. Use the Planning Checklist to see what still needs attention. These tasks support the Run Sheet. They do not replace talking through the plan with the people involved. When you need help, open the question mark. The video thumbnail shows the task and its duration. It opens a larger player with an option to watch while you work. Before the wedding, review readiness, confirm the trusted day-of lead, and save a printed backup. Move into day-of only when the plan and people are ready. Then check the correct wedding and role on the phone.
Learn the Workspace steps with short videos
Choose the task you need: wedding timeline editing, vendor contacts, guests and RSVPs, checklist tasks, budget payments, starter templates, a printable run sheet backup, Scope, the Day-Of handoff, or a complete DIY, photographer, venue or catering workflow. Each walkthrough uses fictional training data, includes reviewed English captions, and uses an AI-generated narrator. Pause to follow along.
 2:00
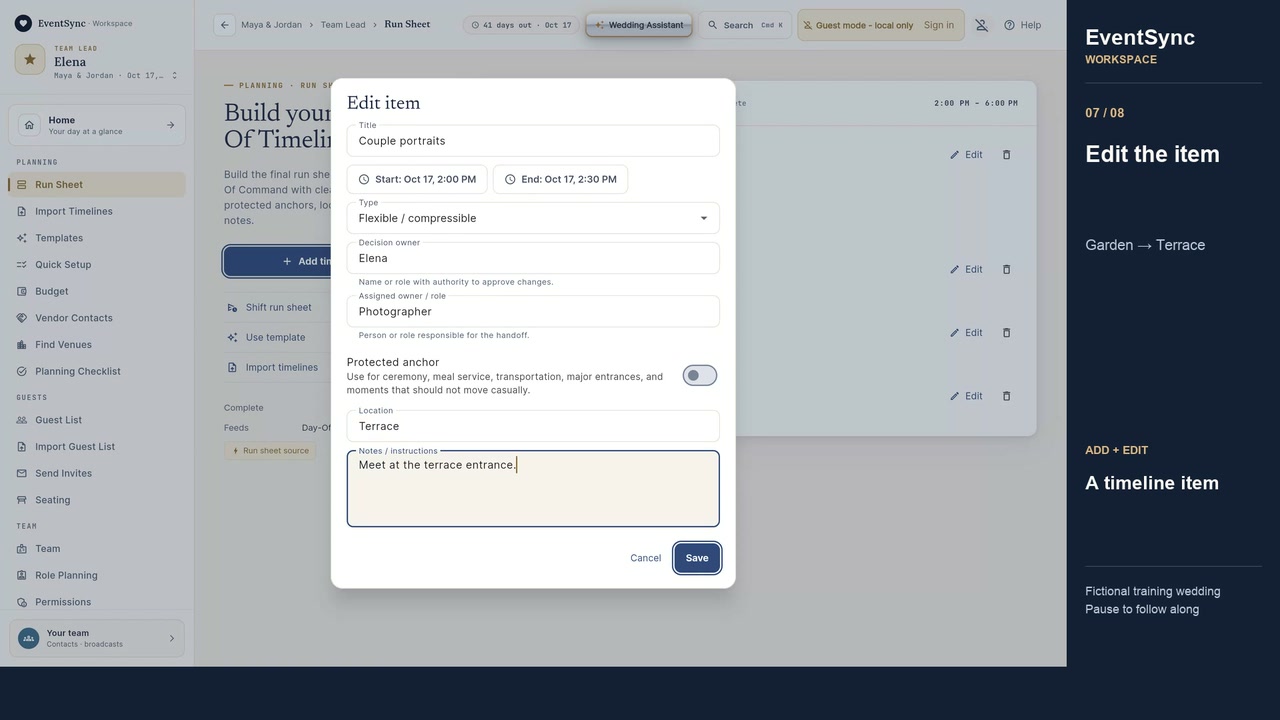
2:00Add and edit a timeline item
Set times, owners, location and handoff notes, then edit and confirm the saved item.
 1:34
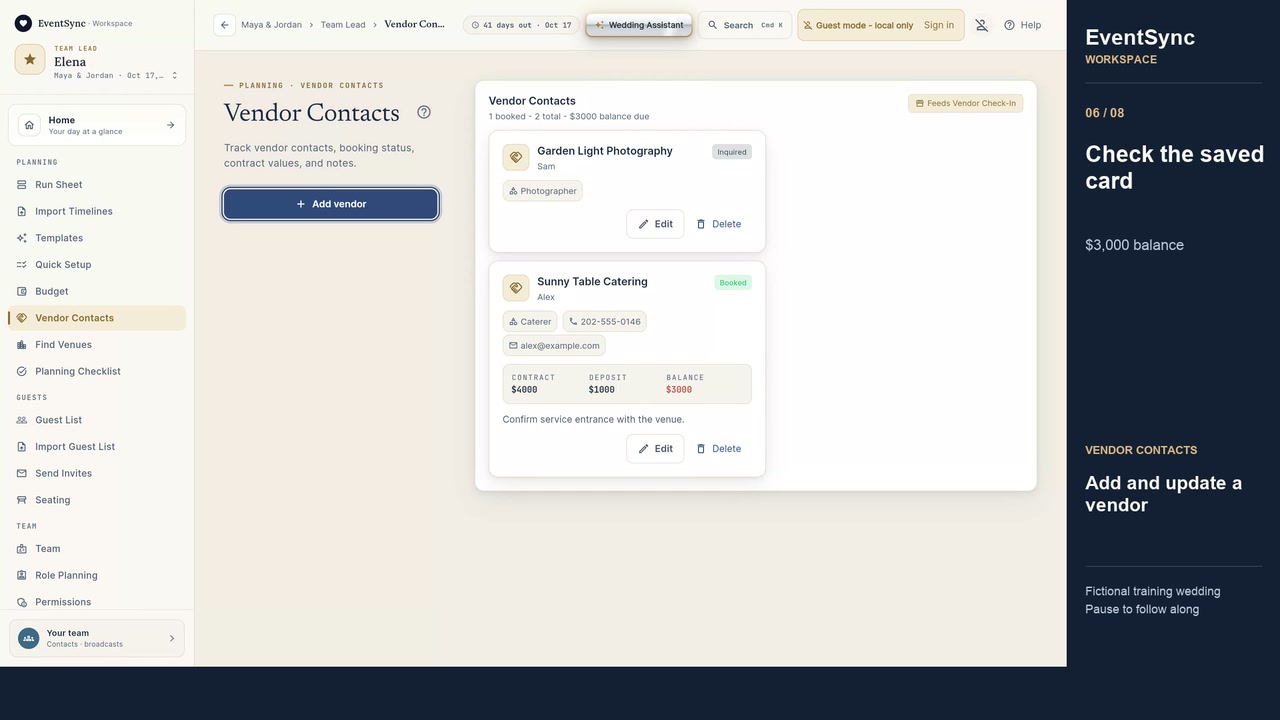
1:34Add and update vendor contacts
Keep a wedding vendor contact, example contract amounts and arrival instructions together.
Read the transcript
Let's add a vendor contact in EventSync Workspace. This is Maya and Jordan's fictional training wedding. Open Vendor Contacts, then choose Add vendor. Enter the company name. We'll use Sunny Table Catering. Choose Caterer as the category. Set the status to Booked, only when that reflects the actual booking. Add the contact person, phone number, and email address. We're using Alex and fictional contact details. The website field is optional for this example. Enter the contract amount and the deposit already paid. We'll use $4,000 and $1,000. Add a useful handoff note, then choose Save. Check the new vendor card. It shows Booked, the contact details, and a $3,000 balance. These amounts are examples. To update the contact, choose Edit on that vendor's card. Replace the note with the confirmed arrival instruction. Use the service entrance on Oak Lane. Choose Save again, then reopen the contact to check the saved details. That's how you add and update a vendor contact. Pause whenever you need time to follow along.
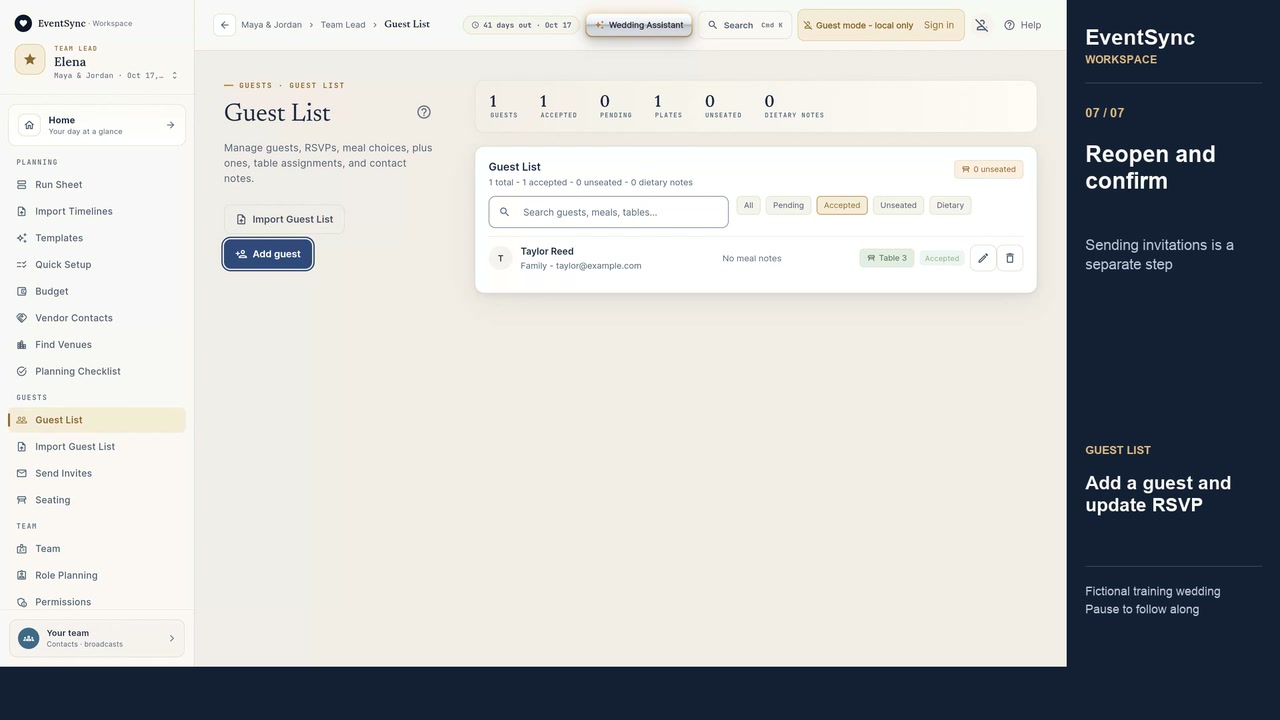 1:24
1:24Add guests and update RSVPs
Record a guest, update their RSVP and table, and confirm the saved details. Invitations are a separate workflow.
Read the transcript
Let's add a guest and update their RSVP in EventSync Workspace. We're using Maya and Jordan's fictional training wedding. Open Guest List, then choose Add guest. Enter the guest's name and contact details. We'll use Taylor Reed, a fictional email address, and Family as the group. Leave RSVP as Pending while you're waiting for a response. Then choose Save. The guest now appears in the list. When their response arrives, choose Edit guest on their row. Open RSVP and choose Accepted. Add a table assignment if it has been decided. We'll use Table 3, then choose Save. Check the updated row and the Accepted count. The Pending filter no longer shows this guest. Choose Accepted to find the confirmed response. Reopen the guest to confirm the saved RSVP and table. This lesson records the guest details and response in the list. Sending invitations is a separate step. Pause whenever you need time to follow along.
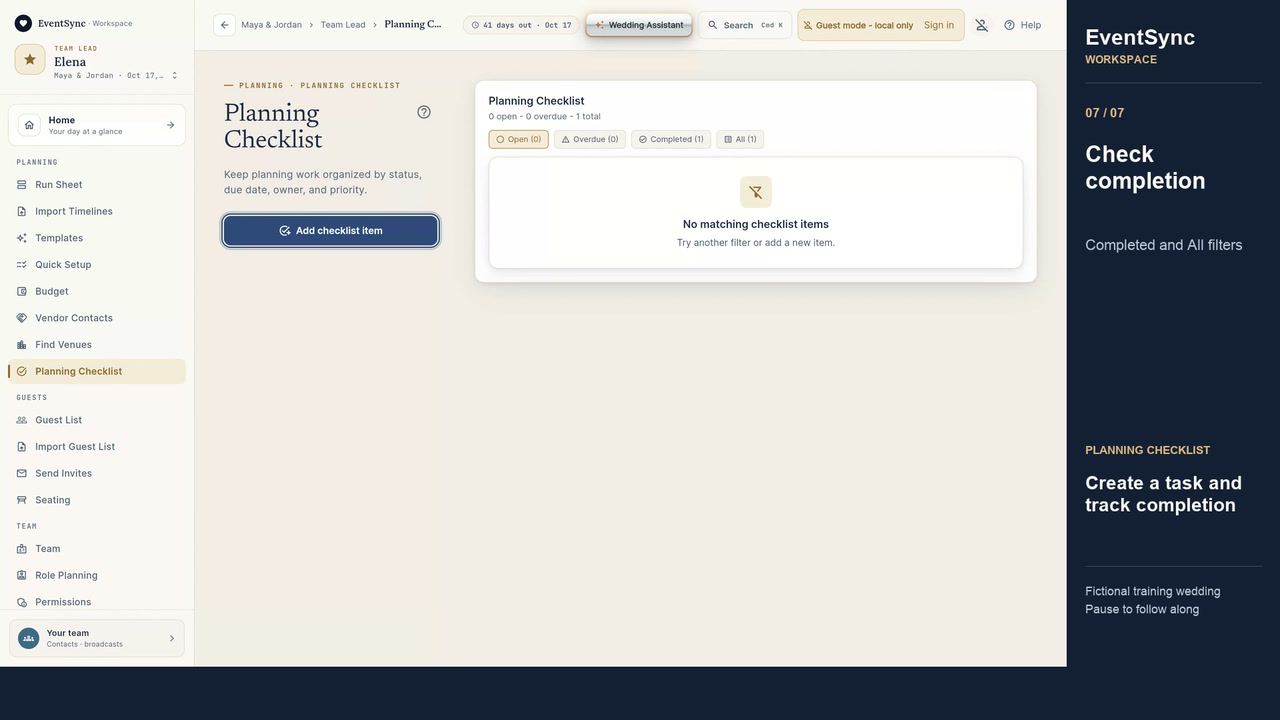 1:23
1:23Create and complete a checklist task
Give a wedding planning task a due date and owner, then check Open, Completed and All filters.
Read the transcript
Let's create a planning checklist task in EventSync Workspace. This is Maya and Jordan's fictional training wedding. Open Planning Checklist, then choose Add checklist item. Give the task a clear action. We'll use Confirm vendor arrivals, with the description Collect the final arrival windows. Choose the timeframe that fits the task. We'll use One Week Before. Choose Set due date. Switch to date input, enter October 10, 2026, and confirm with OK. Assign the task to Elena, then choose Save. The task appears under Open with its due date and owner. When the work is actually finished, select the checkbox on that task. The completed task disappears from the Open filter. Choose Completed to find it again and confirm its checked state. All shows both open and completed work. That's how you create a checklist task and track its completion. Pause whenever you need time to follow along.
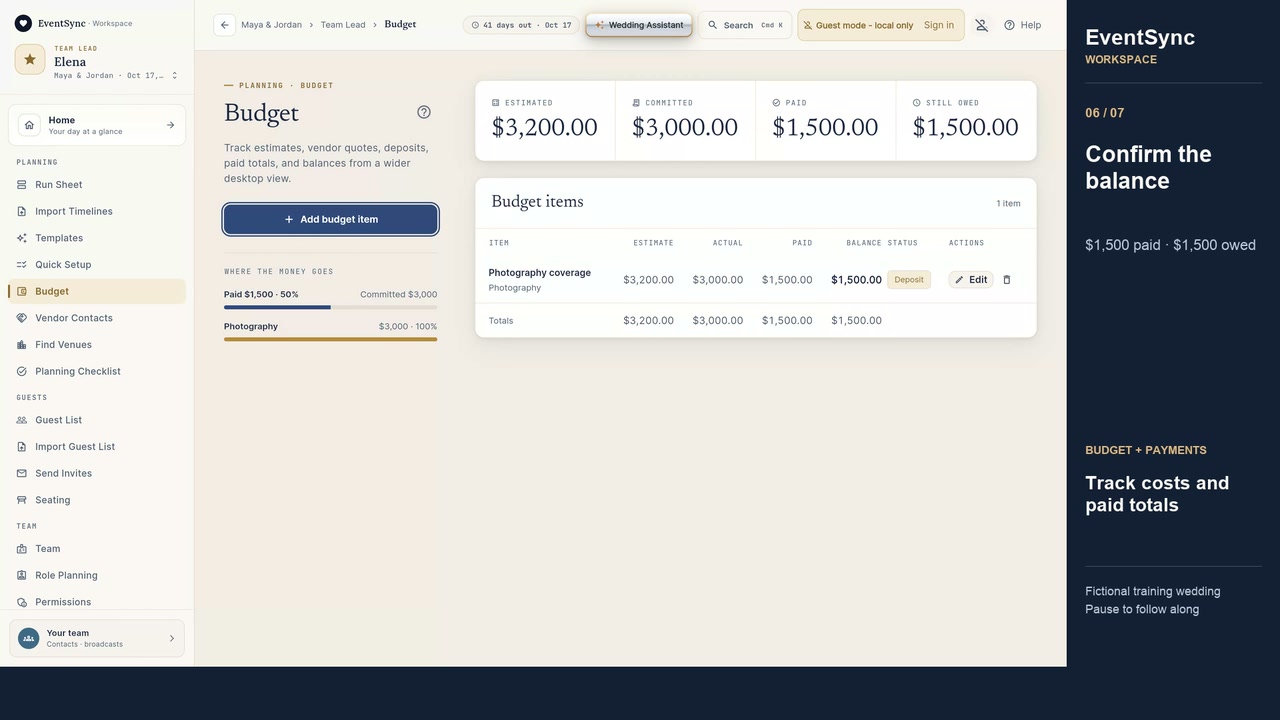 1:26
1:26Track expenses and payments
Compare estimated and agreed costs, record the total already paid, and check the remaining balance. This records payments; it does not send money.
Read the transcript
Let's track a wedding expense in EventSync Workspace. This is Maya and Jordan's fictional training wedding. Open Budget, then choose Add budget item. Enter a clear Item Name. We'll use Photography coverage. Open Category and choose Photography. Budget is our estimate, $3,200. Vendor Price is the agreed cost: $3,000. Paid So Far records payments already made. We'll enter $750. These are example amounts. Choose Save. Check the summary: $3,200 estimated, $3,000 committed, $750 paid, and $2,250 still owed. The row shows a Deposit status. When another payment has been made, choose Edit on the item. Update Paid So Far to the new total, $1,500, then choose Save. The paid total is now $1,500, and Still owed is $1,500. Reopen the item to confirm the saved figures. That's how you add a budget item and keep its payment totals current.
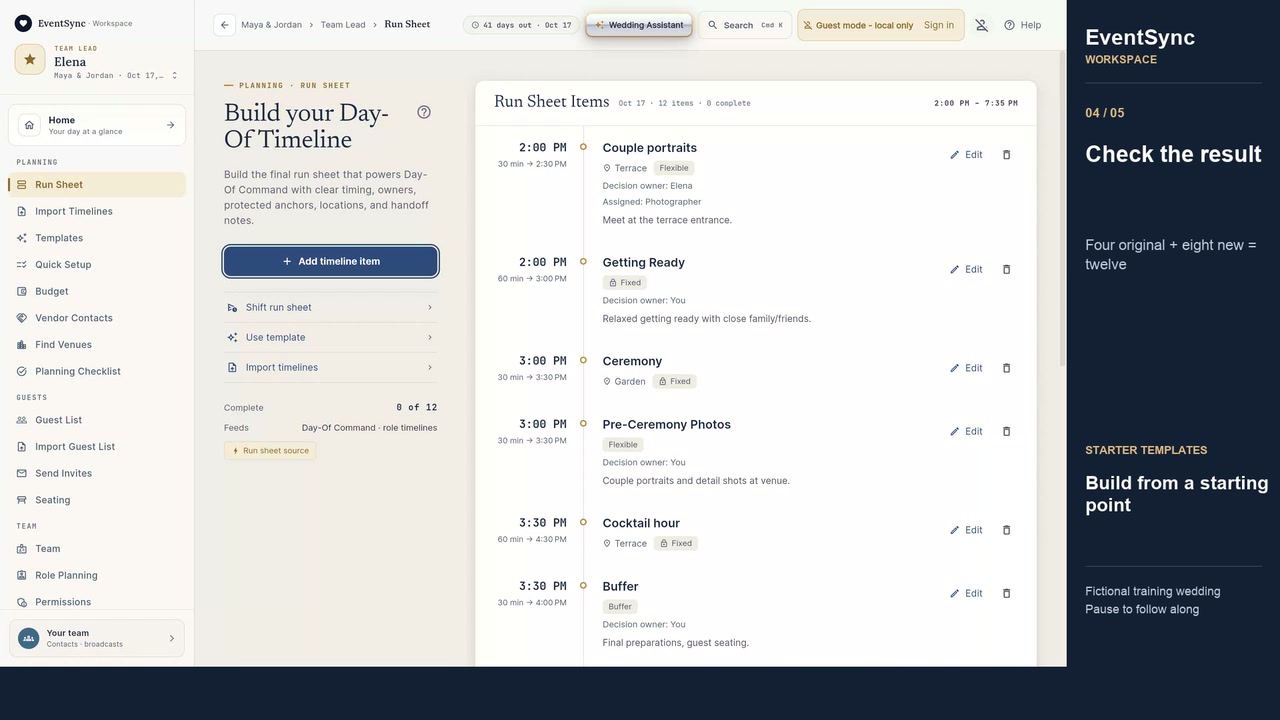 1:10
1:10Use a wedding timeline template
Read the add-items confirmation, keep existing timeline items, and review duplicates and overlaps.
Read the transcript
Let's use a starter template in EventSync Workspace. This is Maya and Jordan's fictional training wedding. Our run sheet already has four items. Choose Use template. Read the descriptions and item counts before choosing a starting point. For this example, choose the ceremony template shown here. It contains eight timeline items. Select Apply on that card. Read the confirmation carefully. Applying this template adds eight items. It keeps the items already in this wedding. Choose Apply template once. Return to Run Sheet. We now have 12 items, the original four plus eight from the template. Couple portraits and its Terrace instructions are still here. A template is a starting point. Review every time, owner, location, and handoff with your team. Because existing items stay, check for duplicate ceremonies and overlapping blocks before using this schedule. Use each item's Edit button to make the plan fit your wedding.
 0:59
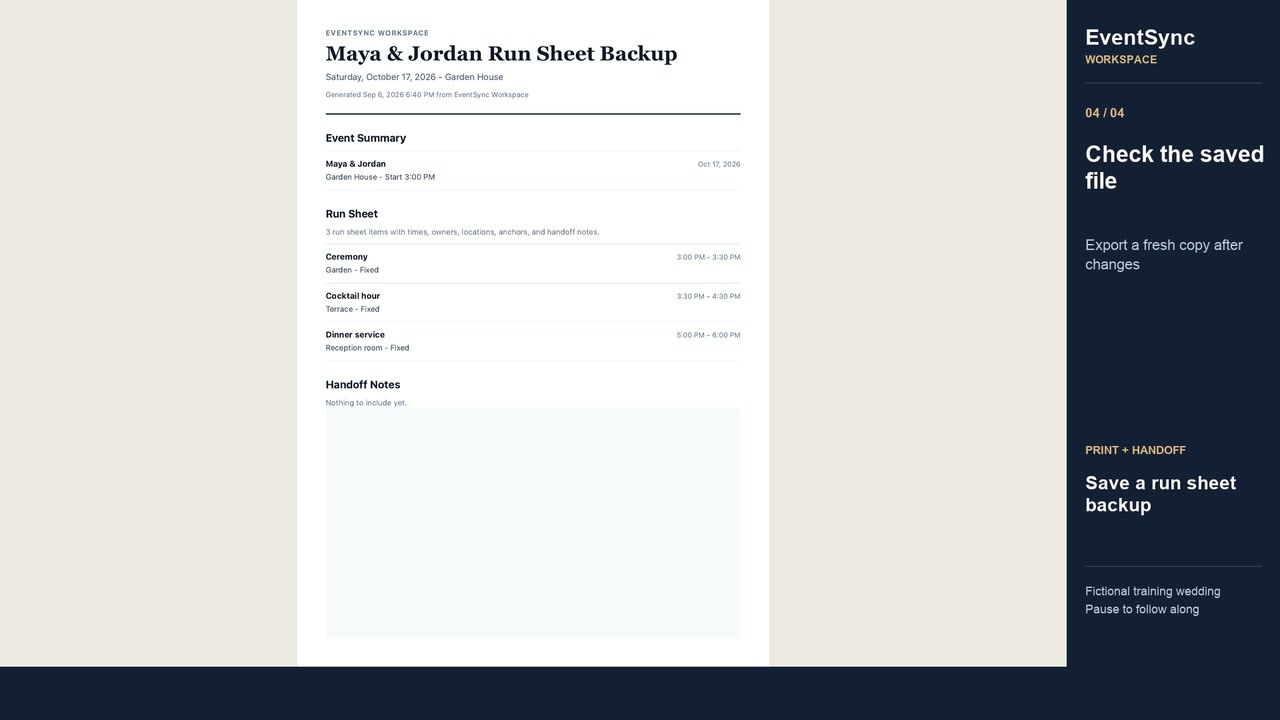
0:59Save a run sheet as PDF
Create a printable run sheet backup, review the saved PDF, and export a fresh copy after changes.
Read the transcript
Let's prepare a run sheet backup in EventSync Workspace. This is Maya and Jordan's fictional training wedding. Open Export Data and choose Run Sheet Backup. The export options include a Vendor Call Sheet for a separate contact reference. For this lesson, keep Run Sheet Backup selected. Choose Print/Save PDF. In your browser's print window, select Save as PDF. Check the preview and margins, then save the file. The exact controls depend on your browser. Open the saved PDF and check every page before giving it to your team. Review the wedding date and venue. Here, Ceremony, Cocktail hour, and Dinner service have the expected times and locations. This file is a snapshot. If the plan changes, export a fresh copy so your trusted team lead has the current version.
 1:58
1:58Show or hide planning tools
Choose the planning shortcuts you need, keep saved information and restore tools anytime.
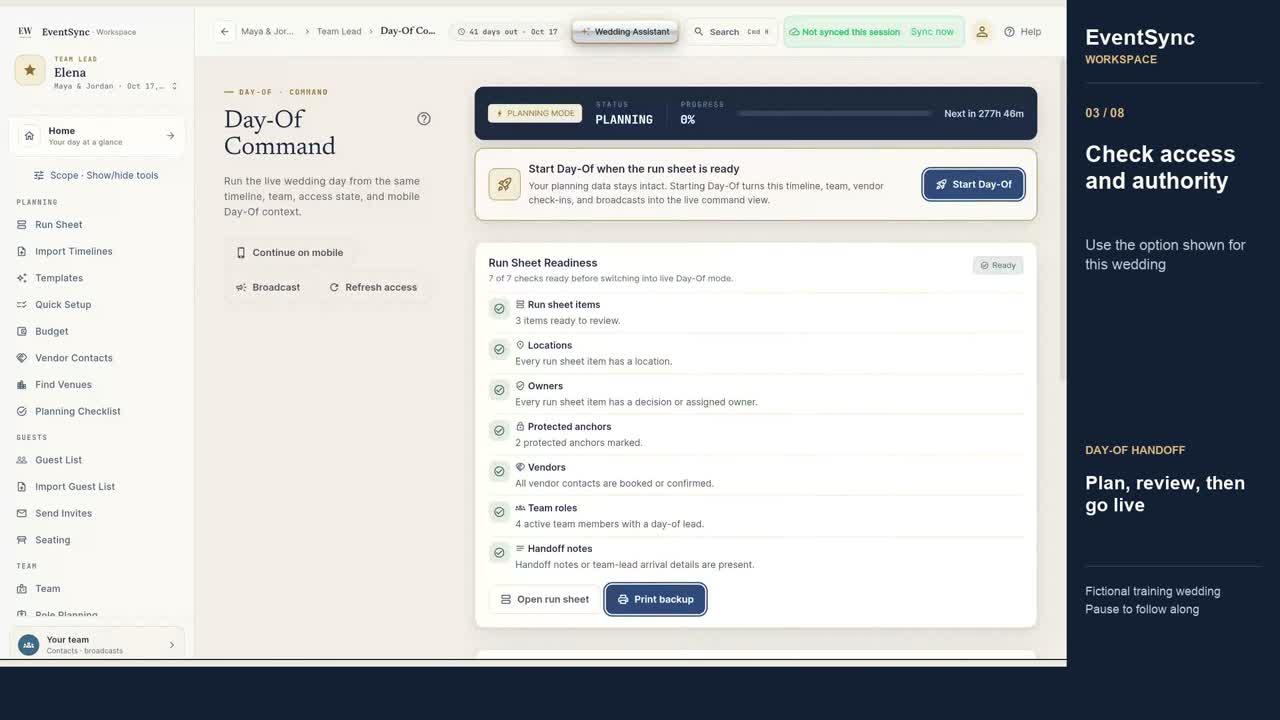
Start Day-Of Command
Review readiness and access, confirm the start, check the live timeline and open the mobile handoff.
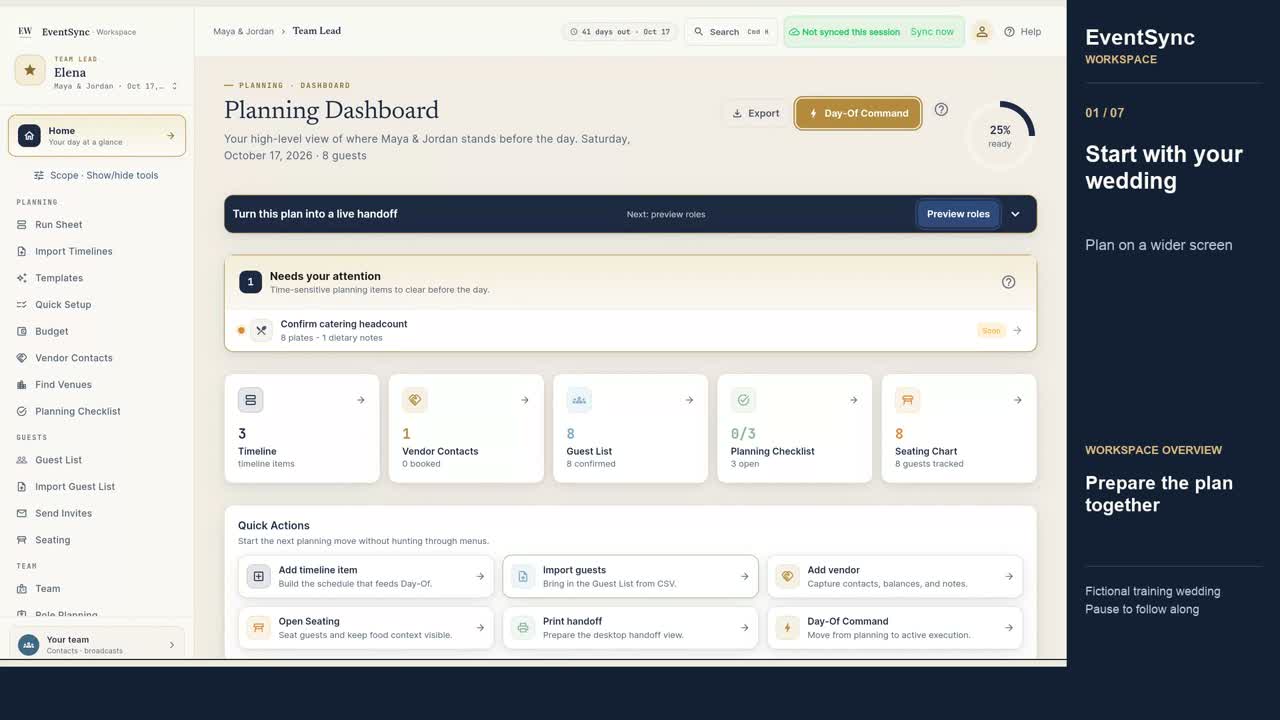 1:45
1:45Plan your wedding with video help beside your work
See how Run Sheet, Scope, Budget and Checklist fit together before preparing the day-of handoff.
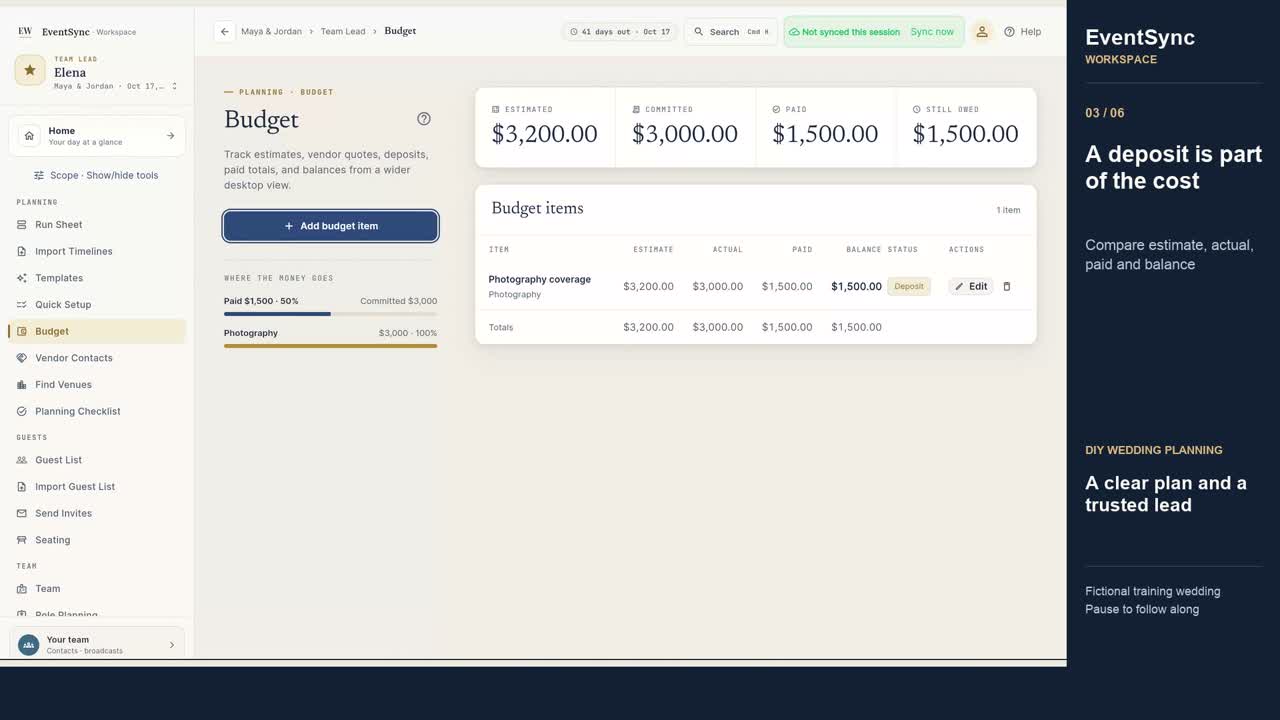 1:37
1:37Build a DIY wedding handoff with a clear budget and timeline
Choose the tools you need, review deposits and balances, and prepare your trusted lead.
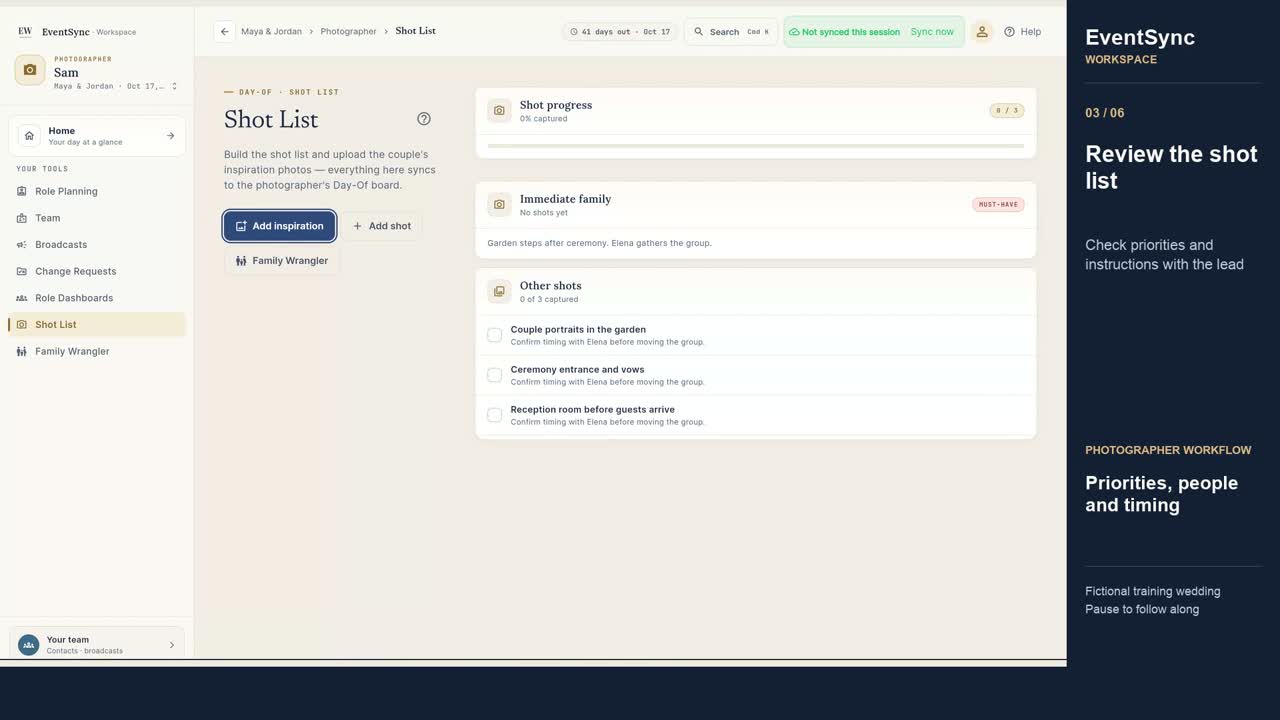 1:35
1:35Prepare the photographer’s shot list and family groups in Workspace
Review the photographer role, shot progress, Family Wrangler groups and the team handoff.
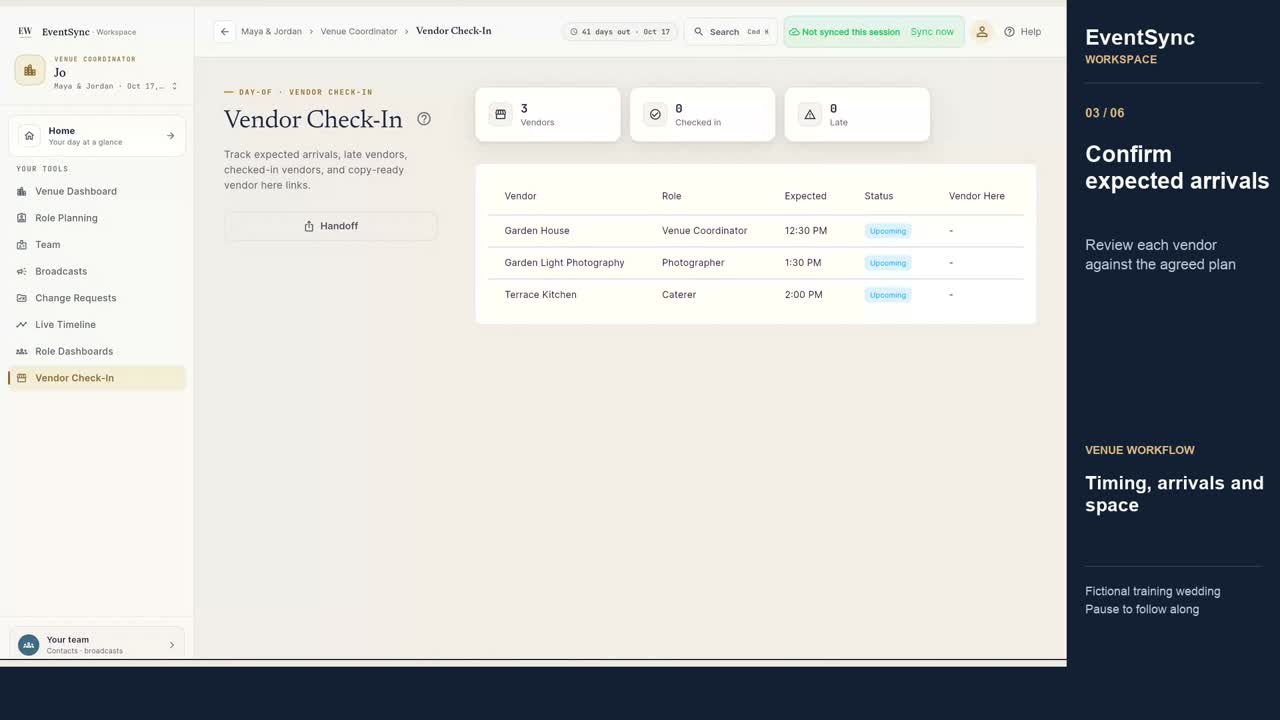 1:38
1:38Review venue timing, vendor arrivals and spaces in Workspace
Check the venue coordinator view, expected arrivals, setup and space use with the event lead.
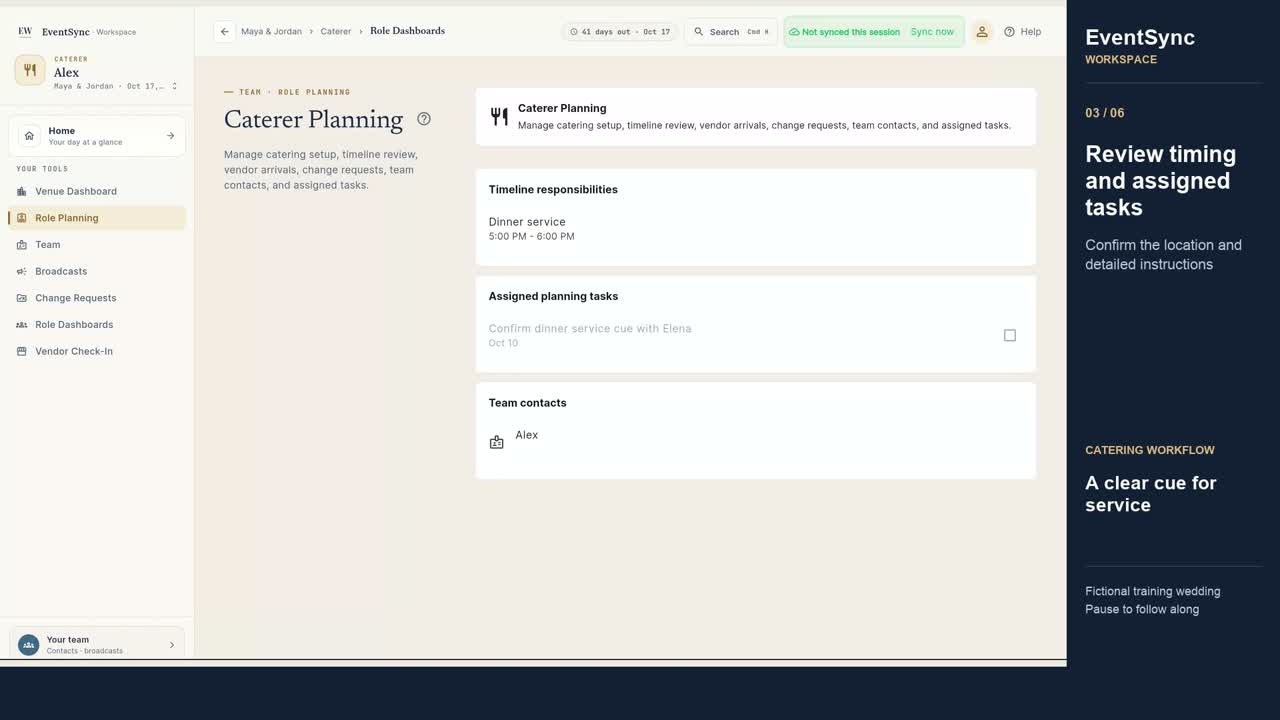 1:52
1:52Prepare a catering handoff with a clear service cue
Review the catering responsibility, assigned tasks, expected arrival and trusted team lead.
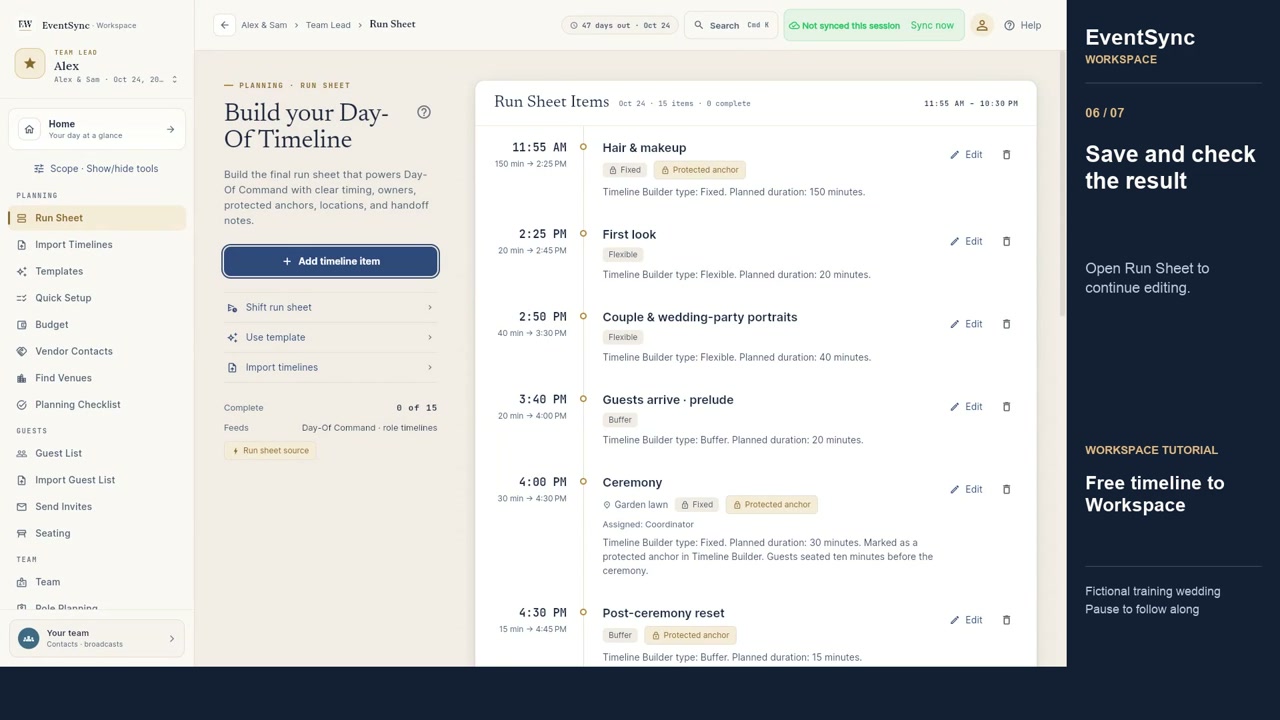 2:25
2:25Move Your Free Wedding Timeline into EventSync Workspace
Carry the free builder draft into Workspace, review and save the plan, then choose the planning tools you need.
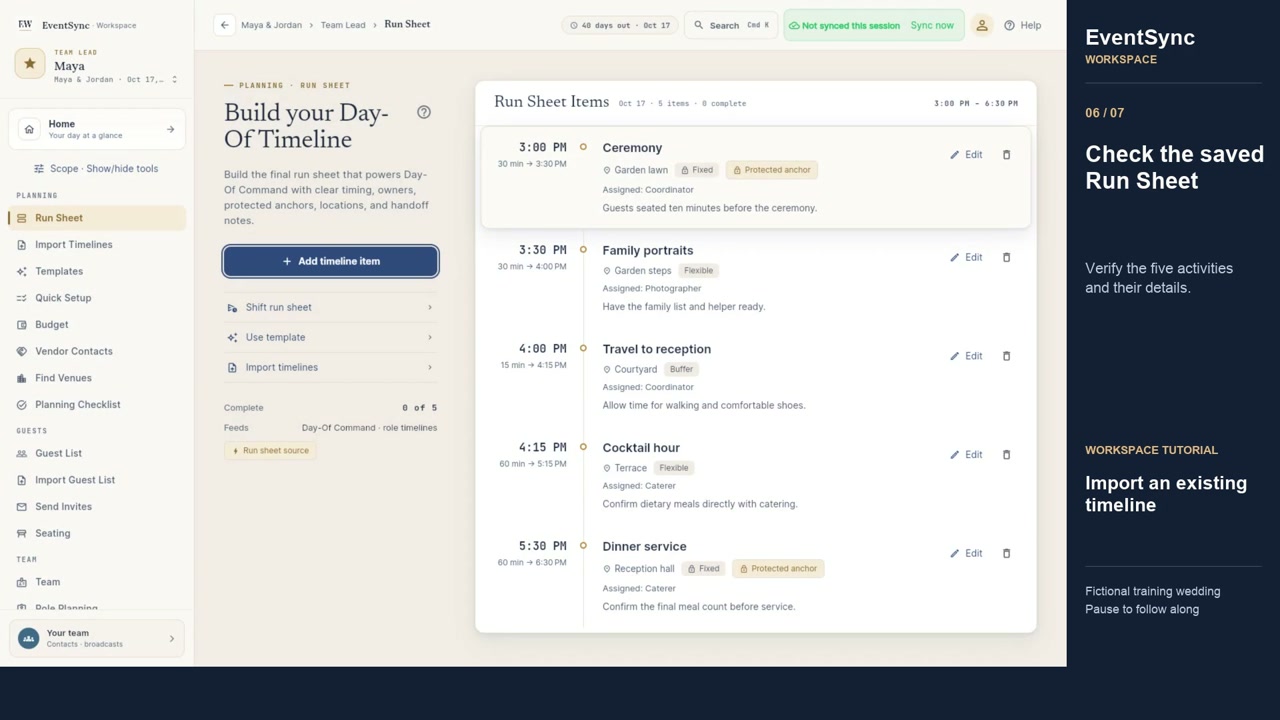 2:13
2:13Import a Wedding Timeline PDF into EventSync Workspace
Upload a wedding timeline PDF, exclude extra rows, review item types and notes, then check the saved Run Sheet.
These are Workspace task lessons. For a starting schedule, compare wedding timeline examples, use the free wedding timeline builder, or get a downloadable wedding day timeline template.
Why desktop planning matters
A phone is excellent when you are moving. A desktop is better when you are comparing, scanning, importing, sorting, and cleaning up details. Workspace is built for the planning jobs that need width: seating, vendor balances, timeline gaps, guest status, checklist ownership, and export review.
That does not mean EventSync is becoming a separate wedding website builder or generic CRM. Workspace is the planning side of the same EventSync flow. Its job is to make the wedding easier to prepare, then hand that plan to the mobile surfaces that work best on the day itself.
The planning-to-Day-Of flow
Start free in Workspace
Create or open a planning wedding, then organize the timeline, Guest List, Vendor Contacts, checklist, seating, and team details.
Prepare role-aware handoffs
Use desktop space to review who needs what: planner, assistant, photographer, DJ/MC, caterer, venue, wedding party, family, guests, and vendors.
Continue on mobile for the wedding day
Open Day-Of Command, Vendor Check-In, SmartRipple, Broadcasts, role dashboards, and live timeline tools when the wedding is underway.
How access and upgrades work
Start planning free in Workspace. Guest planning stays local to the browser; sign in to save and sync across devices. Use the same EventSync sign-in in Workspace and the mobile app when you want to continue with the same wedding.
Day-Of access depends on your plan and the selected wedding. Review the current access options in EventSync before the wedding day, and confirm that the people running the event can open the tools they need.
Who benefits most
- Couples who want one place to organize the plan before the wedding week.
- Planners and coordinators who need a clean desktop planning view plus a mobile day-of command surface.
- Venues and vendors who benefit from role-specific handoffs instead of stale PDFs and scattered texts.
- Family helpers and wedding party members who should see only the details that apply to their role.
What stays the same
EventSync still centers planner-controlled Day-Of Command, SmartRipple recovery suggestions, Vendor Check-In, role-specific handoffs, Broadcasts, Change Requests, and mobile-first execution for the wedding day. Workspace adds a better place to prepare the plan; it does not replace the real person making decisions on site.
Start in Workspace
Open EventSync Workspace to plan one wedding for free, then continue the same event in the mobile app when it is time for Day-Of Command.
Open Workspace Free